Monday 23 December 2013

Boot work

Tackled a few bits that needed done to completely finish of the boot of the Cobra. The first job was to paint the upper part of the boot roof and out to the sides. Makes a big difference and looks good.


Next I noticed a few bits around the boot lip that I had missed when compounding the body, easy to do with the boot closed. A bit of elbow grease and the job was soon done.
I had previously used some reinforced U channel to finish of the inner edge of the boot but the rubber that runs around the boot lid itself to help seal it needed done so that was another job that took a while to sort out.

A bit of a hoover out and everything is finished for the IVA in that area I even polished the inside of the boot lid :). Hoping now the only job that will need sorted around there will be after the test and that will be to change the rear fog light :)


Sunday 22 December 2013

VIN plate

Woo Hoo the vin plate arrived from GD  costs £42.00 but it is a good quality item. There is something about th arrival of the vin plate and the task of mounting the plate that is rather special. It's like the moment you take delivery of the chassis, or the body or fire up the engine.................. well no , firing up the engine is like that one night stand you will never forget lol.
Right,, hmm its another land mark saying , Hey the Cobra is near ready for the big IVA test which is one step or two from being road legal.
I had took way to many hours working out what went where in my engine bay as to me its an area which is more important than the interior, must look clean and simple, extremely hard task with modern wiring and ecu modules.
The Vin plate in pride of place :)


Bonnet finishing

I had been waiting on a few packets arriving in the post, one of those was M4 nut caps to cover the nuts on the underside of the bonnet. The stainless nuts looked ok but just were not doing it for me and I wanted that area to loo a tad tidier.
The double skin on the GD bonnet was of good quality and looking at it in the daylight it was now spot on but hard to show in a picture. The M4 nut caps still needed a slight bit of silicone on each one t prevent them coming off on the road.

Caps on and a rubber lip across the joint where the mesh is bonded on helps the finish of this area.


Boot and Alarm

I had thought the boot was finished but its interesting no matter how often we visit an area of the build that we see something else we could do or improve on existing work that we have completed.
As mentioned in the last post I have been installing a Cat1 Alarm system in the Cobra and part of the inputs had an option for a boot trigger.
There was no boot ground switch installed so this had to be looked into and the best place for a switch sorted. The up side of installing a boot switch meant that it would make sense to install a light in the boot as well that would operate when the boot lid was opened.
After some head scratching it was decided that the boot ground trigger switch would be activated by one of the boot hinges, the reason for this was that mounting the switch anywhere else would look agricultural  and not ascetically pleasing.
In order to shape the bracket and  find the exact striking point from the boot hinge to the switch you need to get into the boot and close it behind you, ps bring a torch :D
The rest is common sense in sorting out where bracket goes and the length of it, my bracket was less than 90 degrees in order to allow the hinge to strike the switch at approx 90 degrees. The ground trigger acted as 2 functions, the first was to operate the interior boot light and the second was to trigger the alarm.

Only took 1 picture and most of the bracket is hidden but you will get the general idea. The bracket is bonded on with sikaflex or any other polyurethane sealant.  If it bond body panels then a small bracket isnt going to move. the light is attached to one of the screw fixings for the hood however sealant would bond the led light in place as well.
One other job I noticed in the boot was the large grommets for the roll bars. If the rain or water was driven in either via wind while driving or just a windy day water would drip into what ever luggage was in the boot. I decided to seal the outer rims of the grommets to help prevent this possible occurrence.


On my list to do when nout else to do is smooth rite the top of the boot, hind sight a great thing..................... do this before installing the carpets as after the carpets are installed you start to notice it looks iffy and you will want to paint it :) I painted the back of the boot previous but never thought of doing the roof part.


Tuesday 17 December 2013

Speedo and Alarm

Not a lot done over this past week as the car is near finished for IVA and I am waiting on parts coming from GD to finish off a few jobs, had hoped they would of been here last week but hoping they will be here for the coming weekend.
One thing I had not checked was the Speedo reading and upon testing it was not registering at all. I ended up taking the steering controls off and the dash out again to get at the wiring to test, turned out that one of the Speedo wires was not connected as per the diagram I had. Speedo is now reading but needs calibrated later.

I have a Cat 1 alarm system to get wired into the car and now is as good a time as any to get it installed as I wont be applying for the IVA test to the new year.


A lot of the wiring wont be needed for the Cobra so will go though most of it before installing in the Cobra, once Installed and pictures taken of the hidden wiring and mountings I'll get the local center to issue a cert for the insurance. I bought the unit from them and they are happy for me to install the unit myself knowing the cars wiring.


Thursday 12 December 2013

Boot pistons

The boot pistons which was ordered a few days ago arrived in prompt time and it was time to get stuck in and get them fitted.
The first thing was to mark out and make brackets for the bottom of the pistons, these were a bit odd in shape but strong and didnt flex under pressure from the piston.


The picture above shows the bracket flowing the contour of the boot lip


Straight on


The bracket fitted now and as the picture shows the majority of the bracket is hidden.


For the upper bracket 2 alloy rivnuts were installed in the boot lid


Upper bracket made and the upper part of the piston attached, 


First side completed and the same was carried out on the other side. The piston pressure was set so that both were equal pressure and held the boot open but not with to much pressure as to exert to much stress on the mounting points.

Wednesday 11 December 2013

Hood part 2

I got a couple of packets in the post which I had been waiting for. M5 thumb screws and some 19mm wardrobe pole brackets.


Next the hood brackets were sika flexed into the Wardrobe brackets before mounting them to the GRP frames which have been painted. 


Before mounting back on the car  masking tape was put on the bottom of the GRP to avoid scratching.


Hooks added to the screen pillar.


Metal frame attached into the angle brackets.


Masking tape around front screen before adding the front hood frame, also from the bottom of the frame on each side marked in 10mm increments to help with getting the hood spread evenly over both sides. That is everything ready to start fitting the hood but it will keep for another day :)

Monday 9 December 2013

Lazy build day but what a buzz

Our electric was to be off around here most of the day and things had to be done in the AM. After waiting 4 days the local autoparts got in the Miller ATF dexron III for the Tremec 6 speed gearbox. The gearbox oil was the last item that needed sorted before firing the car up, putting it in gear and hoping all went according to plan.
That said and done, the magic moment arrived and with baited breath the Cobra was fired up, clutch in and select gear,.................................. With a knot in the tummy the clutch was let out slowly and forward momentum was achieved, with each rotation the cheesy grin got bigger and bigger.
With the Cobra out of the workshop each trip up and down the driveway got better and better. Very few revs got the rear end twitching, NOTE to myself............. drive easy or the Snake will teach me manners.

A few pics of the new snake seeing daylight for the first time.


Loads still to do on the Cobra but today was well worth waiting for, now its back to the workshop to get a few more jobs completed and the ever impending IVA test............


Sunday 8 December 2013

Hood part 1

Decided to start the roof as the rear fixings are fine for the IVA and it will be a bit less to do after the car passes the test.
On the back of the GRP moldings there is marks for the mounting holes that sit proud, these need sanded and a 4 off 6mm holes drilled through them for the M5 retaining screws.
Next present the moldings to the body of the car AFTER covering the base in masking tape to avoid scratching.


When the lip at the front of the mold is sitting correct and the two halves meet central across the rear tape them into place so they do not move.

Once you happy take the 6mm drill and start to drill the body one at a time with the 6mm bit. TIP...... as each hole is drilled pop a 6mm bolt through the hole before drilling the next one this makes sure nothing can move.


2 of the holes each side are in the wheel arch so you will need to remove the wheels on each side. The next step is to remove the grp moldings then drill the body to M8 which allows the GD supplied retainers to be fitted.


Brings a tear to your eyes drilling into the body :)


With the fixings in the body, its back to the GRP moldings, first is to take 25mm of each molding where they meet in the center of the and make the cut at 45 degrees. This allows the hood when completed to be folded for storage.


The last job on the grp moldings before priming and painting them is to cut them flush with the door shut which is a simple job to mark once they are fitted to the body. After that prime the inside and paint them as this part can be seen from the inside when the hood is finished.


Handbrake return springs

Hunting about in the workshop this morning I came across 2 springs and after setting them down and carrying on with the other job the light switched on in my head. oooooooooooooo pooo they were the handbrake return springs and I had forgot to fit them a long time ago before the body went on.
A first glance I thought I was in diffs as I would of bet there was no way to get a bracket up in the arch to hold one end of the spring with the body on.
Luckily there was enough room to get the drill in and also the rivnut tool to get an anchor point for the springs one for each of the rear calipers.


Spring in place and another job done and dusted :)

Saturday 7 December 2013

IVA stuff

Started of the day making the infill panels for the passenger and drivers side of the Cobra. I had the GD panels that went back a bit but there has been so much talk of what needs covered like the wiper motor or any other edge under 2.5mm, stories of chaps getting failed for a cable tie that has got the excess removed hence i decided the easiest and most sensible route was to make a couple of panels, After all if the magic IVA ball cannot fit somewhere it don't count.#
Before I could fit the panels I had to replace a broken bulb on the clock, so the dash has to be mostly removed to gain access,.................. bulb changed and all back together again.
To mount the extra panels I used polyurethane sealer and some PVC facia I had kicking about which is soft and easy screwed into. The reason for this is that the flat face under the dash is only a few mm thick and the other side is in the engine bay , so BE careful on the length of self tappers used.


Simple but effect the above pic lets a couple of self tappers retain the new infill panel whilst the front face slots into the GD panel that's mounted first.


Panel in place and edged in foam so no sharp edges.


I used some plastic nut caps over the nuts though not really needed for IVA, the Screen cover has some edging around it to cover any edges and also a bit of sticky foam around the brake light switch. Pedals have a rough surface which is another IVA requirement. Cannot see any reason there should be an issue in this area.
Another bit that needed sorted for the IVA I needed rubber boots on the main power cable to the Alternator and also the starter, easy job but one easily overlooked.#


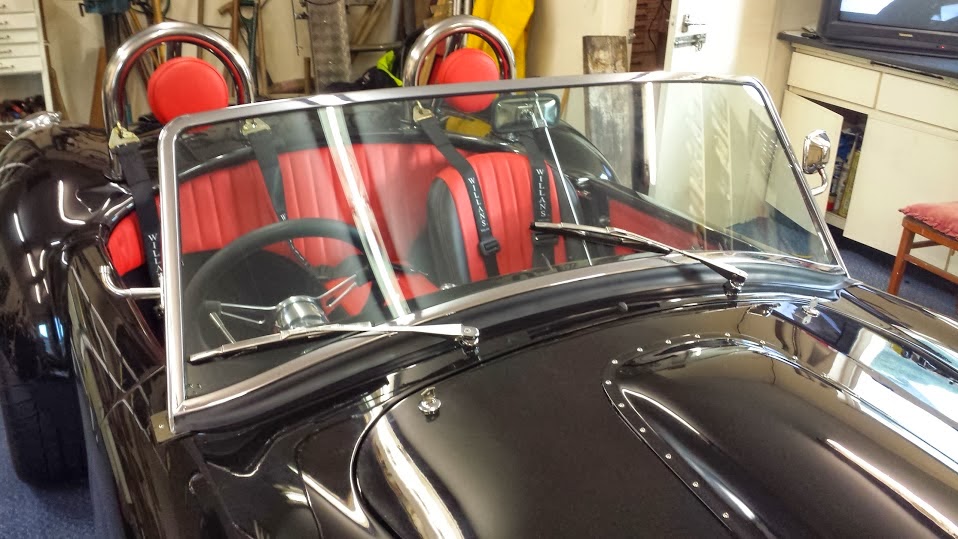
The rear view mirror needed a rubber cap over the arm at the rear


I also added a wee bit of edging around where the support arm mounts to the dash


The top of the arm where it attaches onto the top of the screen also got a wee piece of foam to cover it.


The above pic is the door handles and they need covered at the end as the radius is not more than 2.5mm.


Friday 6 December 2013

Handbrake fitting and wiper arms

Today,s task was to get the handbrake system all properly sorted out, I had sent the cable of to speedy cables to get the right end fitted on it. Once the cable was fitted and tensioned The handbrake level cover and bezel was fitted.
The length of the cable wasn't altered with the new end but I did notice that the adjustment was well out to get the new cable to lock the wheels around the second click of the handbrake so I cut a slot in a few washers and fitted then just before the first caliper. I'll have to try and remember and also put it in the build file to get the cable 20 - 25mm shorter the next time but the outer casing the same length.


Once the handbrake was out of the road the wiper arms were fitted which was straight forward, some copper grease was added to the spindles to leave them easy removed at a later date.
The washer bottle was also filled and the washers tested and adjusted so they were aimed correctly at the windscreen, In saying that they still want to force some water over the top of the screen ad if I aim them any lower they dont push enough water up the screen to clean it correctly.


Coming along bit by bit, remembered today as well I need to get some ATF dexron 3 for the gearbox and thats a job best not overlooked :)


Thursday 5 December 2013

Bonnet Rams part 2

Made a start on the passenger side upper bracket today, The bottom part of the ram was bolted into place and then the position marked on the bonnet where the top bracket was going.
Pic below shows the ram in place and compressed along the inner wing. The wing is marked, bonnet closed and bonnet marked where the paint mark was put on the inner wing.
This gives the mounting hole point of the upper bracket and the rest is handy enough.


In the picture below you can see where the center mark is on the Bonnet, the top bracket is then set in place and the holes marked , drilled and alloy rivnuts inserted.


With both sides  done and tested that they were working exactly the same the brackets were removed and painted before the final fit below.


All in all it seems to look a lot better than the standard single bracket.
The Piston rams are called Nitrolift, there website is http://www.nitroliftsupports.com/

part number GS8-18-210-270


Wednesday 4 December 2013

Bonnet Rams Part 1

I didn't like the standard bonnet stay that keeps the bonnet open, they look a tad agricultural so I ordered a couple of  Gas pistons. These exert a lot of pressure and the inner wing area needs strengthened in order for these to be fitted.
First off was to get some 30mm alloy angle which has a 3mm wall thickness, A 300mm strip was cut for each side of the car. The alloy completely went up behind the passenger side but needed about 7mm trimmed of the drivers side.
A hole was drilled 150mm along each bar and tapped for M8 which is the thread on the piston rams. They are now ready to be installed. I mixed up some fiber repair paste and slid the angle up the back of the inner wing and held it in place with the end of the ram.


And now with the bracket bonded into place 


The bottom joint of the Piston ram is basically directly above the Black anti roll bar. 
The next stage is to make a bracket for the upper part of the ram. The position of the bracket is gained by having the ram connected to its bottom mounting place then compressing the ram fully while horizontal with the inner wing then mark the spot on the wing. Next close the bonnet and mark the bonnet where it meets the mark on the inner wing.

When making up the bracket the piston needs to be down the bracket a around 20mm or the ram body will foul when closing as I found out with the first bracket that was made.

I made the bracket 125mm long as the bonnet inner skin is not that thick for the force of the ram and used 4 fastening points. The vertical part of the bracket is 35mm and the 8mm hole drilled at 28mm down.


Bracket then set up against the bonnet and the holes marked, drilled and some light alloy rivnuts inserted as self tappers would be useless.


There is one other hole in the pic above but that was for the old type stay and not used now.


Bracket bolted into place for trail fit., Needs removed again to clean up the edges and generally finish it off and paint it black before final install. Still have the other side to do but that's for another day.

Tuesday 3 December 2013

Steering

While working on the wheel rubbing on the inner wing issue. I noticed that there were a few tight spots in the steering. This happened when turning the steering from full lock one way to full lock the other.
Its important that the universal joints are all on the exact same alignment or out in 90 degree angles to each other. They cannot be say 30 deg apart. Mine were spot on so this wasn't the issue.
Upon close inspection it was found that the middle Universal Joint was catching on itself while turning.


In the above picture you can see the 2 back edges are touching and rubbing, this also happens when the steering was turned another 180 deg etc. It turns out the Universal joint had  a few ruff cast edges and needed trimmed back/


Luckily enough I was able to do this while everything was still in place by using the pencil grinder and just turning the steering round to get at each of the 4 faces. Job now done and painted, the steering turning properly. On to the next job now :)