Monday 31 October 2011

Pedal box

What started out to be smallish job ended up taking a long time to do. I thought I was at the point of adding the brake pedal switch and then simply bolting the pedal box back in, hmmmmm wrong, quite a few hours later with the pedal box in and out a few times and a sore back its in now and I hope it don't have to come out for a long time.
Once I made the bracket for the brake light switch I ran some rubber U channel around it, not sure if its needed for IVA or not but better safe than sorry. Once I put the pedal box back in I looked at the spacings of the pedals and remembered that for people with broader feet needs the pedal spacing tweaked. As I had the footwell extension in I could move the clutch and brake pedals over towards the tunnel, I also moved the acceleration pedal at tad. I ended up with the pedal box in and out a few times to get this right for me and taking it apart each time to alter the pedals in the vice. Not easy putting the pedal box in on ur on bolt wise. I thought once this was done that was me , errr em nope, I noticed the goo goo pedal :) was just a straight bar right up and nothing there to attach the throttle cable to, suppose this is due to the fact we fit so many engines/cables. I had to take a while and figure out the route the throttle cable needed to go from the engine back to the pedal. Took a while to get the best route but once it was attached to the bulkhead wall I could see what mods needed carried out on the pedal shaft to attach the cable. I drilled and slotted the top and then added a stainless Jubilee so it could never jump out of the locator.
Pedal box was then bolted up and during this the adjusters were set for the brake and clutch cylinders, just more time :)
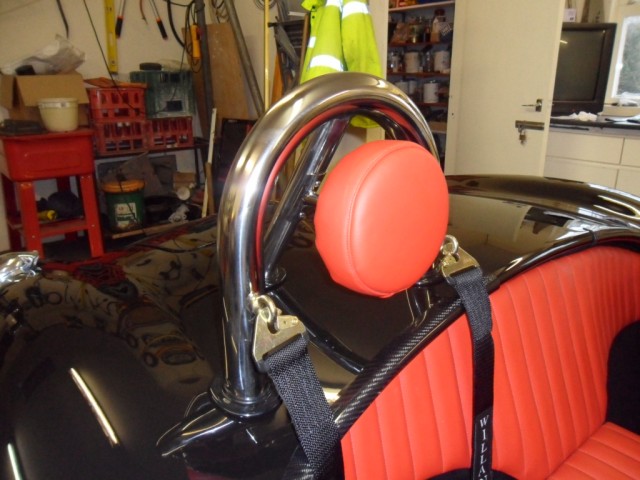
On another note I removed the windscreen pillar cover and ran some rubber U channel around it, again for IVA and their edge rule, I also replaced the lower bolt for a dome head again just to be safe. Some pics below, not sure what I'm doing next but loads to choose from :)

                                                                  Pedals moved to the left
                                                              Plenty of foot room now :)
All bolted up and throttle connected, rubber around windscreen pillar cover.
                                            Stainless throttle bracket added and cable attached


Sunday 30 October 2011

Footwell extension and carpets

I started on the car today by taking back out the drivers seat and making a start on the handbrake mounting position and getting the mounting holes drilled through the carpets and body floor. I need to get my handbrake cable shortened and a different end put on it. Will ring speedy cables tmw and hopefully that will get that snag sorted.
I went to do the drivers side bulkhead carpet then realised I had not fitted the footwell extension, worse still I had not drilled all the holes in the body to get it bolted up. Well this took ages to do but we got there in the end. I put alloy rivnuts in the extension piece and used 5mm button heads inserted from the inside. I also run a bead of  silicon to help seal it.
Once the extension piece was installed next began trying to carpet round the extension and the last bit of the tunnel, hmmmmmm pain in the butt this was and I was getting a tad high with my head right inside the footwell lol.
I also glued in the small bulkhead piece once i cut the holes out for the pedal box.
Before the pedal box goes back in I need to make a brake switch bracket to mount on the pedal box that's the next job on the to do list.


Saturday 29 October 2011

Seats and Harness

Started off the day by tidying the workshop as I hate tools lying everywhere and then i cant find anything.  Finished of all the harness anchor points first then started into the seat adjusters. I fitted them to the seats before drilling the holes in the shell for mounting the seats in. All bolted in so thats a bit more done and dusted for now. Tmw's another day :)


Friday 28 October 2011

Roll bars and interior

Got back to doing the final mounting on the roll bars. The rubber seals i made up were stuck to the boot floor with sikaflex. I drilled and tapped the rear leg of the roll bars to allow fitting of the new head rest mounts. I got some stainless steel thread bar to allow mounting to the headrest.
Took a while to get the hoops into place and everything bolted up, Job done now :)
I set the seats in the car to see what the interior was going to look like, looks the mutts nutts :))) well happy with the design of the seats I come up with, red stitching looks well on them.
Hope to get a bit more done over the weekend, some pics below of the work done and car now.


Sunday 23 October 2011

Interior carpets, leather , trim

The progress starting to show now on the interior though a long way to go yet. The carpet is all fitted now apart from one bulkhead piece where the pedal box goes.
I fitted the side carpets first then the tunnel carpet before doing the rear bulkhead and the front bulkhead. Once the carpets were in the leather tunnel top got fitted after the brackets where made and the gear lever installed.


Door rubbers fitted and end finishers installed on the passenger side, DS finishers still need sorted. I fitted Carbon kick strips at the bottom of the doors and also behind where the seats go. The ones behind the seat should stop the harness from rubbing on the body work.


 More progress soon  :)

Friday 21 October 2011

Interior leather

Needed to make up a few stainless brackets to bolt the tunnel leather top on, I measured quite a few times before cutting the 100mm hole for the gear lever. The gaitor i spent a bit of time on, firstly getting it so the eschusion screws went through the leather as well and I also added some contact adhesive between the eschusion and leather then used a few bolts to secure it to the tunnel top until it set.  The stainless tabs are ready to be bent around the tunnel and screwed on.
Working on the interior carpet tmw and trim, I'm hoping to have all the carpet fitted by Sunday. Pedal box is removed ready for the bulkhead piece on the drivers side next.


Thursday 20 October 2011

Door cards etc

Got both the door cards fitted, they were simple enough to do just needing 7mm holes marked out and drilled for the door card clips and a nick in the leather for the handle to be fitted.

Made a start on the interior carpet doing a dry run, more on this on the next update, I made up some temp head rest brackets as I,m getting some different one made up by GD that connect to the rear leg of the roll bar.

Another job that need done was to make up some rubber seals where the roll bar legs go through the floor of the boot to stop any ingress of water, I can't final fit the hoops yet until I mark out then drill and tap the holes in the rear leg where the final rest rest brackets will be fixed. Once they are done thats the hoops hopefully ready to be properly fitted.


Got some rubber U channel and fitted it to the inner lip of the boot, makes a nice tidy finish to the area, I still need to get some rubber seal and fit it around the boot as well to stop any water getting in.


Tackling a few other bits on the interior at the moment will post more on the next update, thats all for now, theres work to be done :)

Monday 17 October 2011

polishing

Not a lot to say on todays exploits apart from sanding and loads of buffing to get the back of the Cobra polished up. There were a few places that had chips/scratches so i had them filled before. I wanted to more or less get the final polish done before the Roll hoops went on again and I had one repair behind one of the over riders to sort. There were a few other chips etc to be sorted up front so they were tackeled but a few need done again due to air bubbles etc. Anyways looking a lot better now after quite a few hours.
Couple of hours yet before bed time so maybe time to get one of the door cards fitted :)


Sunday 16 October 2011

Interior

I started of the day by making a small list of some bits I needed and then finished in the boot for now. I need to sand and buff the back of the car again as there is a few wee scrapes and much easier before I fit the roll hoops again.
Anyways the inside of the car had been neglected so far with pretty much nothing done, first the floor got painted just to tidy it up, I know its covered with carpet but it looks better for now.


With that done one of the door cards was tackled next it wasnt that hard with the clips in the door cards to transpose the marks onto the door for drilling the 7mm locator holes.


Looks pretty good and makes the car look a little further on.
Next I started to look at the side carpets etc then realised the ridge around the door needed trimmed back to 12mm ,grrrrrrrrrrrrr I thought I had all the dusty fiberglass cutting jobs done, anyways I marked a line right around both doors with the scriber and cut and sanded the lip to 12mm.
Onto the Centre carpet I got it out to see what way it fitted and tried to figure out what way to put it down and also mark where to cut it for the gear lever.
I ordered eschusions from GD as well to tidy up the opening in the body for the door hindges, these come flat and laser cut, part of them needs bent 90 deg before fitting.


 Once the 4 eschusons were bent the tape was peeled of them and give them a quick polish before fitting to the passenger side. Drivers side will get done at a later date.

Saturday 15 October 2011

Boot carpet

I got stuck into the boot carpet, I was really surprised just how much carpet it takes to cover inside it boot area, seems more than there is inside the car. I got my carpet set from GD, its most likely cheaper to go and buy carpet and do your own but by the time you would pay someone to edge all the carpet I recon its better to buy the GD set as they use the best quality carpet :)
It took me a lot longer to fit and glue in the carpet than i first though, maybe cause I got a tad high on the contact adhesive a few times, very easy when ur head is inside the boot :))))))))
I still need to glue the bit that covers the back of the lights but the rest is done and dusted, will glue the last bit when all is sorted. I painted the very back of the boot just to tidy it up. Ooooo i cut the holes for the Roll hoops as well, but they may need made bigger when i go to fit them
While I was working at the rear of the car I fabricated up a couple of stainless steel brackets to fit the reflectors onto. I secured the brackets onto the overrider brackets.
Not sure what I'm doing next, there are that many jobs to choose from but i,m sure something will attract me in the morning :)


Wednesday 12 October 2011

Boot area

The boot is coming along nicely now, The fuel tank is now installed and strapped into place with a couple of stainless steel straps I had made up.I used rubber under the straps so they did not rub on the tank. Fuel sender is wired up as well, I ran an earth to the tank and well and up to the filler cap, not sure if its needed for IVA but it done now anyways.


Filler pipe and connections done to the Cap and a beather pipe put in.


shinny bling cap :)


While I was in working arond the boot I fitted the tail pipes on the exhaust system, I think the look well and the GD exhaust is very tasty done in 316 stainless and all tig welded.


I took out the big box of carpet I got from GD, there is some load of carpet to be fitted in the boot. looks like more for the boot than inside the car. I have a few more jobs to do in the boot before I start putting the carpet in like a cover for the fuel pump/filter.

Monday 10 October 2011

body mounting

A few hours today spent getting the rest of the bolts lined up and the body mounted to the chassis. Apart from doing this I side tracked  and sorted out the tubing for the air horns and also the wiring.
I put some foam above and below the bolts in the boot so the petrol tank would not touch them when fitted .


As The bolts were being put in place they were coated with waxoyl.


Sunday 9 October 2011

Time goes by

Been ages from I got any work done to the Cobra project, over this past 2 weeks I did get back into the swing of things having some extra time. The first few nights got taken up on where on earth was I on the build and trying to figure out where to start etc.
Well the first job was to get the body of :( The rubber mounts that attach the body to the chassis have rivnuts in 10 of them and 2 without, hmmm I only found this out after the body was on hence I could not get the bolts into 2 of them. Anyways there were a few we other things I could tackle with the body off again. I suppose its the beauty of the GD Cobra that the chassis and body can be seperated quite quickly though it does take a while to put it back on again on your own but I,ve done this twice now and I'm happy enough doing it myself.
The fuel system in the boot had some work done as well, I made up a stainless steel bracket for the fuel filter and fuel pump, insulated with rubber and also used 6mm rubber to mount it to the body, this should keep any vibration down. I mounted the pressure regulator above them and connected the lot up using fuel safe braided hoses and using the GD connection kit. need to run the hose out to the solid fuel line yet after that I will look at getting the tank strapped down.
 Body being lifted on on the winch.


I had to add more numbers to the chassis number for the IVA .
One of the rubber mounts I had to change round.


Fuel system.