Showing posts with label Windscreen area. Show all posts

Friday, 6 December 2013

Handbrake fitting and wiper arms

Today,s task was to get the handbrake system all properly sorted out, I had sent the cable of to speedy cables to get the right end fitted on it. Once the cable was fitted and tensioned The handbrake level cover and bezel was fitted.
The length of the cable wasn't altered with the new end but I did notice that the adjustment was well out to get the new cable to lock the wheels around the second click of the handbrake so I cut a slot in a few washers and fitted then just before the first caliper. I'll have to try and remember and also put it in the build file to get the cable 20 - 25mm shorter the next time but the outer casing the same length.


Once the handbrake was out of the road the wiper arms were fitted which was straight forward, some copper grease was added to the spindles to leave them easy removed at a later date.
The washer bottle was also filled and the washers tested and adjusted so they were aimed correctly at the windscreen, In saying that they still want to force some water over the top of the screen ad if I aim them any lower they dont push enough water up the screen to clean it correctly.
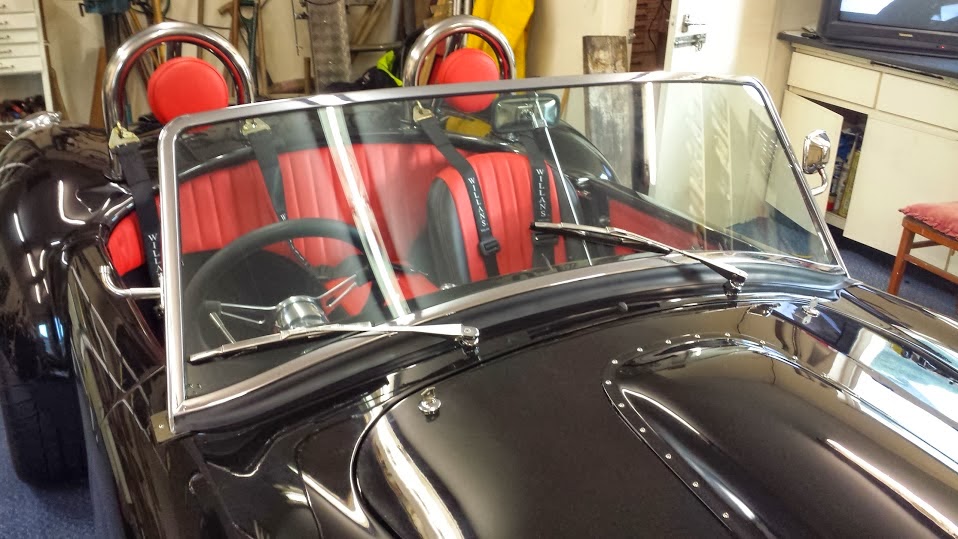


Coming along bit by bit, remembered today as well I need to get some ATF dexron 3 for the gearbox and thats a job best not overlooked :)


Sunday, 24 November 2013

Control stalks

The steering column area got a wee bit done on it today as well, the stainless cover I have for the front face of the steering column has symbols engraved on it so Andy said the stainless stalks could be fitted before the IVA test. First was to run the hacksaw through the plastic stalk just before the flange where the rubber boot sits over.


In the picture above you can see the exact place the stalk is cut and filled. Once thats done a small pilot hole was drilled in the center of the shaft then a 5mm drill used to drill down the stalk. The length that the stalk is drilled is the amount that your GD stainless stalks are threaded.


Once drilled and tapped with a M6 x 1.0mm tap the stainless stalk is then screwed in. I applied some thread luck or nut retainer medium grade when doing this.


Dash

I got pulled away from the car for most of this week as work just went mental and was working all hours over the past 5 days to get on top of things so I could get back to the important job again :)
The build is coming along nicely now and getting to the stage where I need to really forward plan on small silly bits or jobs just cant be completed.
With all the wiring in the dash area out of the way for the IVA it was time to start getting the dash mounted, unlike the leather covered dash the carbon dash has to have bolts secured to the back of the dash as bolting though the dash would look a tad naff even with button heads.
Some strips of stainless was cut for the 4 mounting bolts and then drilled with a 6.5mm hole in the center, the bolts were then put through the flat strips and welded.


Pic is a bit poor but shows the job, Next was to mix up some fiberfill repair paste and put a blob on the back of the dash. The mounting bolt was then pushed onto it and more paste added to cover the securing bolt. One thing for sure it isnt going to vibrate off.

Once the bolts had set a corresponding hole was then marked and drilled in the body. I used some marked paint on the ends of the bolts to mark the dash and drilled the holes. As the dash is presented at an angle due to the bottom lip of the dash the dremmel was then used to elongate the holes down slightly to get the dash to fit snugly into place.


Dash fitting now though the bottom alloy plates have to be sorted to fit properly yet.


Saturday, 9 November 2013

Been a long time from I have got near the build so needless to say a long way behind on things. I spent about 2 days trying to figure out exactly where I had left off which just happened to be in the middle of the wiring.
Glad I made notes but finding the file was another time consuming issue :)
I started on the wiper motor and got it wired up, It will need tested later when the power is put to the car for the park position.
Next was the washer bottle which had been a pain in my side for a long time not knowing where  to install it. Being plastic it didn't float my boat to say the least having it in the engine bay.
After a bit of head scratching I decided to put it in the drivers side compartment where the clutch and brake master cylinder lives. In doing this I had to modify the wiring loom a bit.
Once in place and wired I then made the decision just to fit one twin washer jet after talking to a few on the forum etc. The Jet is positioned 20mm back from the edge of the lip nearest the bonnet and 41mm from the screen rubber. This allows fitting room for the nut at the bulkhead inside.


With the washer bottle now living in the compartment with the clutch and brake master cylinders I then decided to also put the fluid reservoirs for these in the compartment as well rather than the engine bay, this was down to both reservoirs again being plastic and I could not source nice stainless steel ones on the net anywhere. I then modified the brake level sensor wiring so it would end up in the compartment.
As the compartment is dark I have ordered  an LED light which I will install when it arrives which should provide good lighting for inspecting the fluid level of the 3 containers. I ran a couple of wires in for this light also.


The only down side to this moving was that I already had the 6 holes drilled in the engine bay before the body went on for all the reservoir tubes so on the outside I had to make up a stainless steel plate to cover the holes not in use. 


Sunday, 19 December 2010

Brightwork

Wooooooooooooosssssssssshhhhh and another weekend is away.

Time seems to be flying by Cobra wise and this was one of those weekends where wee jobs took 5 times the amount of time to do as anticipated or should have, putting things in marking, taking out , drilling etc. O yea marked the flaming car as well, Nout a wee sand some gel and more sanding and buffing wont magic out, just more time Sad

Had hoped to of got the body on before Xmas, maybe fingers crossed it may be on for the new year.

Anyways I got the screen out and back into the car now and the centre stay bracket sorted, mirrors on now as well so it actually starting to look in some small way like a car.

Took ages to mark out the positions of the rear overriders, one of the
jobs meaure loads and drill once.

Friday, 17 December 2010

Rear lights , mirrors etc

Got some more work done on the Cobra.

I sanded round the rear of the car and done it with some G6 for now, not worried about the finished polish for now as every time I drill a hole it pops fiberglass dust around the place and the wee particles of glass when very lightly dusting down the car do tend to scratch it. Apart from that I leave the odd wee mark :(

Anyways apart from that I took apart the side mirrors and removed the brackets they come with to fit the GD made ones,


The GD bracket just screws to the black plastic ball which pulls out of the old bracket once the screw is undone.

With the GD brackets mounted on the mirrors, The screen was put back in the car to mark out a few jobs, from the screen escutcheon to the bottom hole of the mirror is 160mm. Once the screen is of the car again I'll drill and tap them.

Next I marked the screw holes for the escutcheons, then onto the centre stay bar. One of the brackets that come with this is not right for the GD see bracket in pic left. Its to small so I had to take some stainless and make another bracket up (right pic) then polish it. Bit more work to do to this and then mark holes to be drilled in the dash for mounting screws.
What else ....... I drilled the holes and mounted the rear fog and reversing light, They are mounted 7" either side of the boot centre. Number plate light also fitted now and connections made.


Hope to get the various holes sorted around the screen sorted next and then buff the screen dash area before putting the screen back in. Hopefully it wont be out again after that but I aint holding my breath on that one lol.

Wednesday, 17 November 2010

Wiper spindles

Once the screen is fitted I could mark out where the wiper spindles go, they start 5mm out from the edge of the screen rubber and 415mm from the adge of the screen post. Its the same for both sides. these holes are at an angle hence not round. I found the best way to get the shape was using the washer from the spindle kit and to get the angle i used the plastic sleeve that goes over the spindle. Also with the screen in its a good time to mark out the heater slots.
Then its screen out and start cutting :)


Windscreen

Doing it this way is very accurate and no need to elongate holes etc. GD have a measurement for the posts 35mm from the bottom of the post and 175mm for the 2 holes but due to each screen being hand made I think this is the best way to install the screen. Also doing it this way makes the job easy for one person to do on their own as the steel bars help hold the screen in place :)


Windscreen

Got a bit more done this past while
The GD body has threaded inserts moulded into the body and the centres of these inserts need to be transferred onto the legs so some reading done and some lengths of steel flat - drilling them for the screen fixing bolts, screwing them to some blocks of wood and bonding the blocks of wood to the inside of the body also made up some spacers that were the same diameter as the post legs from the carbon cut from building the dash. Thanks STR for the tip :)
The screen needs to be 6mm of the bulkhead at the posts on either side and also 930mm from the curve on the rear bulkhead to the top of the screen (inside measurement at top of screen)
Pictures speak 1000 words at times so some pics.